Two Useful Applications for Upscaling 1080p to 4k
Video Grabber
The first application that can convert 1080P to 4K is Video Grabber. You’ll find this application is not only a file converter but also a video downloader and screen recorder. Its interface is very easy to understand. And the layout of its features are very user friendly. This web service is said to be totally free and no signup or register is required suppose one who wants to fully use it. But you should know that the Internet connection is necessary and the conversion speed depends on the file size and the number of your files.
- Visit the official web page and click on Convert Video tab.
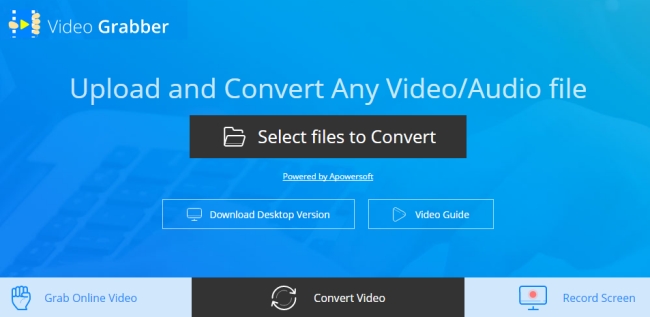
- Click “Select files to Convert” and you can choose file from the open folder.
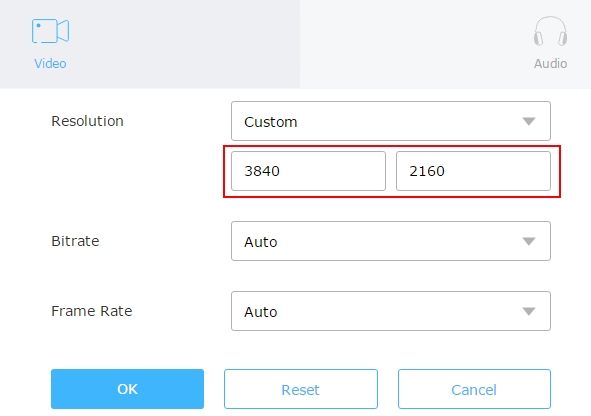
- Click “Settings” > “Resolution” > “Custom” and set the resolution to 3840×2160.
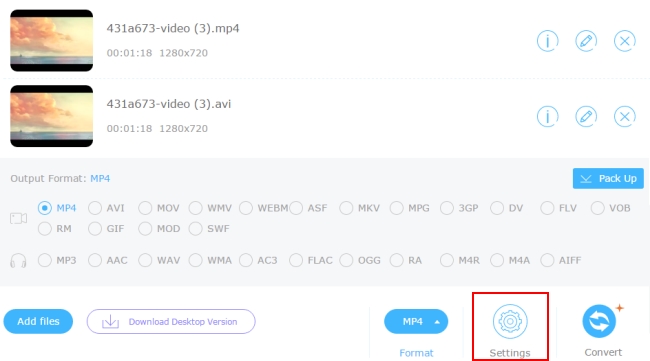
- Click “OK” to save the settings you did and select a file format for outputting the file.
- Finally, click “Convert” to save the video as a 4K file.
You’ll be asked to install a launcher if this is the first time you use it. The launcher is 100% safe and clean. It’s just used to initiate the web app.
As it is stated before, this 1080P to 4K converter can be worked as a video downloader and screen recorder. When you use it to capture videos from the internet, it will let you choose your preferred format and resolution or you can just keep it same as the source. Its screen recorder provides several modes. You can record video or audio only.
Video Converter Studio
Another program that you can use for converting 1080P to 4K is Apowersoft Video Converter Studio. Compared to the web service, this desktop software gives people more stable and professional experience when converting the resolution. It accepts nearly all kinds of video files and converts them to different formats and resolutions. It even lets you set the resolution manually. See the below guide.
- Download the exe file by clicking the following button and install it to the computer.
- Open the program and click “Add Files” to load the 1080P video for upscaling to 4K.
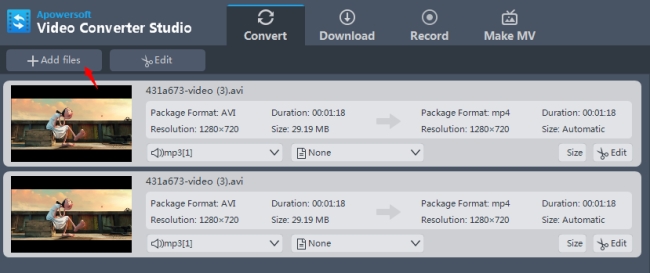
- When the file is displayed in the software, click “Profile” to select a format and the corresponding 4K resolution you want it to saved it in.
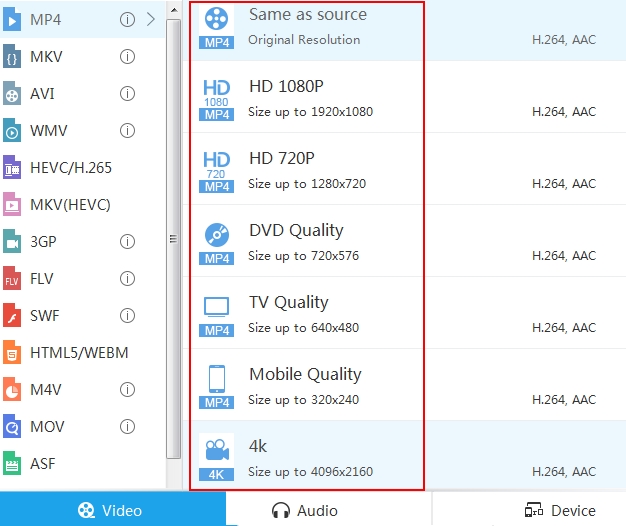
- For customising the resolution, click “Settings” and you can input the width and height manually.
- Click “Convert” and this 1080P to 4K converter will start to save the changes you did for the file.
Besides improve the resolution, other features that this software can do are:
- Edits videos and audio basically. You can trim, crop, rotate, watermark and subtitle videos, etc.
- Downloads videos from nearly all video sites. The available quality options are ranging from standard to 4K quality.
- Records screen activity in multiple modes, like region, full mode, around mouse, web camera and only audio.
- Creates photo slideshow with favourite pictures and music.
Simple Comparison of 1080P and 4K
Despite the fact that 4K technology is gaining more attention and becoming widely available as time goes on. There is still a long way to go before it completely replaces 1080P in the digital video world.
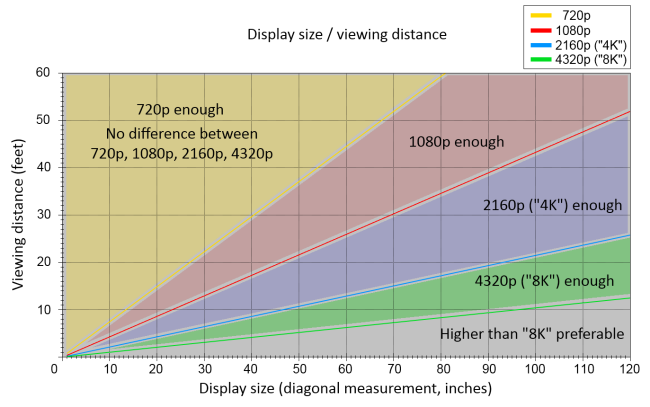
4K is commonly known as UHD (Ultra-High Definition). It consists of at least 3840 pixels x 2160 pixels. When you measure the HD resolution with pixels, 4K can also be called 2160P. It is twice times wider and twice times higher than 1080P (1920×1080) in terms of width and height of a video. Thus it gives 4 times larger in screen resolution overall, which is the source of its name 4K ultra HD. Therefore, a video in 4K displays a higher quality than that in 1080P.
Bottom Line
In fact, the differences between 1080P and 4K is far more complicated than I explained above. I put it in such a short paragraph is to help you get an intuitive idea when you are hesitating to increase the video definition from 1080P to 4K. Throughout the digital market, 4K products or 4K entertainment devices are growing gradually. In the next year or two, I believe you’ll consider buying a 4K product.


Leave a Comment 115