 Video clips that was composed of several images is one of the popular type of video that is being shared across the various video sharing and social media sites. There are many reasons why people tend to make this kind of video.
- Some individuals convert image to a video file, for them to pay tribute to something, such as a personal moment, a family event, tribute to friendship and the like.
- Moreover, some may use this method to create a fantastic video slideshow that will serve as a representation or discussion.
Aside from sharing it online many people burn or transfer the video into a DVD which they can watch anytime they want. These are just some of the reasons why people turn photos into video. However, to make this kind of video is still a problem for you, especially if you are novice users.
The most convenient way to convert photo to video
You can find different ways online on how to convert image to video, but most of them are very complicated to do. To avoid any confusion and troubles, here are the most convenient methods for you to create a video from multiple image files in no time.
ApowerEdit
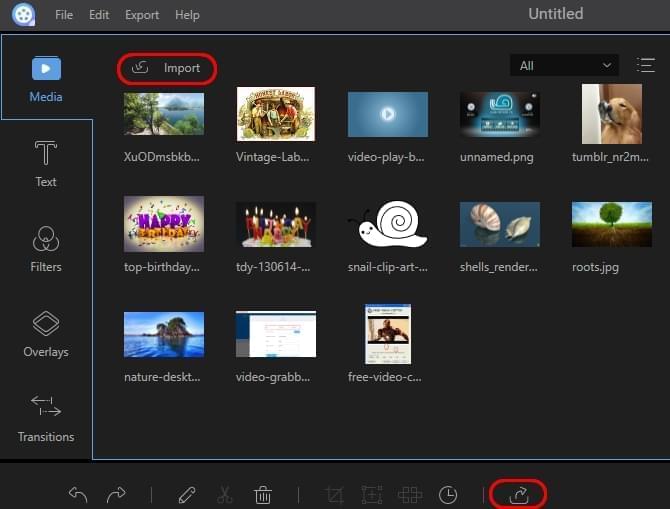
ApowerEdit is designed especially for users to create video easily by using many kinds of media files including audio, video and photo. It comes with a very useful multi-track timeline editor where you can drag and drop file, add effects, trim or rotate video, and do other editings. It supports nearly all kinds of media formats and can output video as popular formats. It’s super fast to convert photo to video via this tool.
- Click Download button to get this software onto your PC. Proceed to install and run it.
- Click “Import” > “Import file/Import folder” to load all the photos that you want to convert to video. Drag and drop the photos to the timeline.
- Move down to Text, Filters, Overlays and Transitions tabs, you are allowed to add these effects to your photo by simply dragging and dropping operations.
- Click “Play” button to preview the video you create. Then click “Export” button to output it.
Animoto
This is an online based photo to video converter that is been frequently used by many netizens and video enthusiast, since the process is very easy to do. Upon opening its webpage simply click on the “Make video” button and you can immediately select a template or the style that you want for your video.
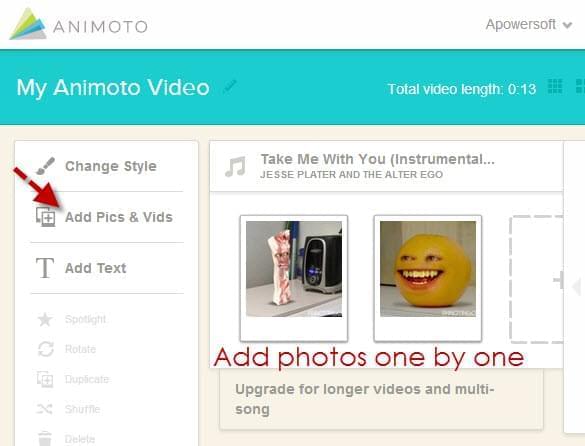
From there you can upload your images one by one, can add text, and songs according to your style. Once done you can save your video and you can export it to YouTube or you can make use of its embedded code so as to share it on other sites. The only demerit of this application is that you are just allowed to create a 30 seconds video clip, and if you want to exceed that, the only thing needs to avail its monthly subscription of 5 dollars.
Windows Live Movie Maker
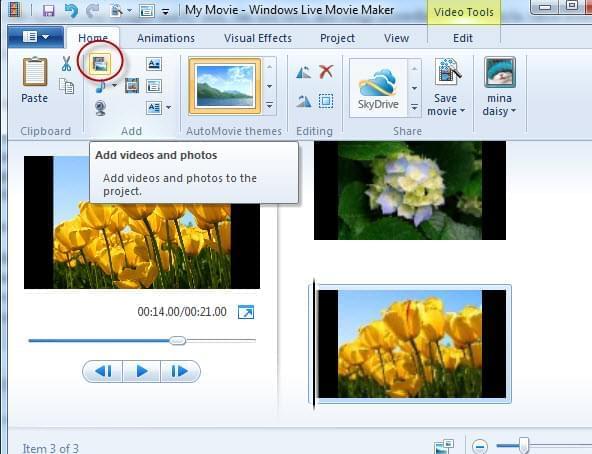
If you want the most basic way to make photos into video, then you can make use of Windows Live Movie Maker. To begin with the process, just open the program and import all of the videos that you will need for the project. Next is to drag them one by one on timeline, and once they are all set, you can begin with adding transitions, text, songs and animations according to your preference. In spite of its basic features it is still a reliable method to be utilized.
Freemake video converter
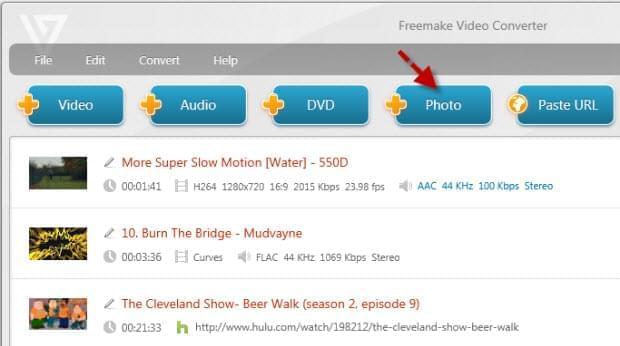
In our next method we will going to make use of Freemake video converter. This is also one of the photo to video converter that can turn multiple images into video in a matter of seconds. Once the program is open, simply click on the “+Photo” icon and you can add all of the pictures that you will need for the project. Next thing is to add your desire music background by clicking the “slideshow” to open the editor. When all set just click “Ok” and your video is done. Now the last part is the conversion part where you can select the type of format do you want for your output. You will also be given an option to burn this video file on a DVD.
Upload your video to YouTube or have a personal DVD copy
When you are done converting your images into a video, then it is now time for you to upload and share them to YouTube or keep a copy of it for later use. But first you must polish it through the use of Windows DVD maker. Moreover, if you want a more professional way of doing it then it is advisable to use Apowersoft DVD Creator. By using this program you are being entitled with various features that you can only get with this application.