I want to edit my videos but the thing is I just need the changes on a specific frame. I know some video editing programs but I need a program that can help me view each frame of my video. Are there any editors that allow me to do that? And if there are, will it allow me to make further editing, add texts and change background music? I need to edit it right away because I’m presenting it to my class. Thanks!
Many video amateurs or professional video makers are looking for software that can help them edit their video frame by frame the same as you. They want to add texts, effects, or sounds to make their video more elegant. However, some of those are difficult to use and require professional knowledge. In your case, I’d like to suggest these different video editing programs that I think are easier to use in comparison to others.
Suggestions for frame by frame video editor
- Solutions available for Windows Users
- Apps that Mac users can use
- Shareware for editing video frame by frame
Windows Live Movie Maker (for windows)
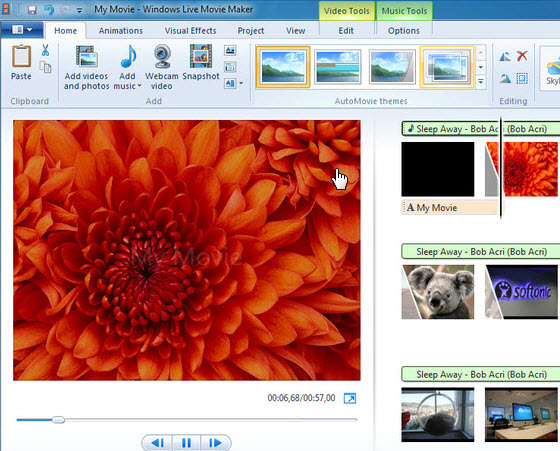
If you are looking for a simple way to edit your video on the Windows platform, Windows Live Movie Maker can be a top choice since it is a built-in program for PC users to use. It has a wide range of basic editing functions for free use. This app can let you edit video frame by frame as there is a video timeline feature in it.
After you load your video in the right panel, you can view the video on the timeline frame by frame. Select the portion of the video you want to modify and click “Edit” under Video Tools, then “Split”. This will allow you to separate a portion of your video from the whole clip. Once you’ve selected your frame, you can now easily add texts, music, voice over recording, transitions and effects from the menu bar. To publish your file, click “File” > “Save movie” and select from the options given for the format and compatibility of your video. Remember if you are on Windows 10, you can’t use windows movie maker because it has been moved to the Windows Essential software bundle.
Pros:
- Free and easy to use.
- A simple interface is good for beginners.
- A variety of editing functions are included.
- A wide range of output settings are available.
Cons:
- It crashes a lot.
- The output format is limited to WMV and MP4.
- Loading of large files takes time.
Video Converter Studio (for Windows)
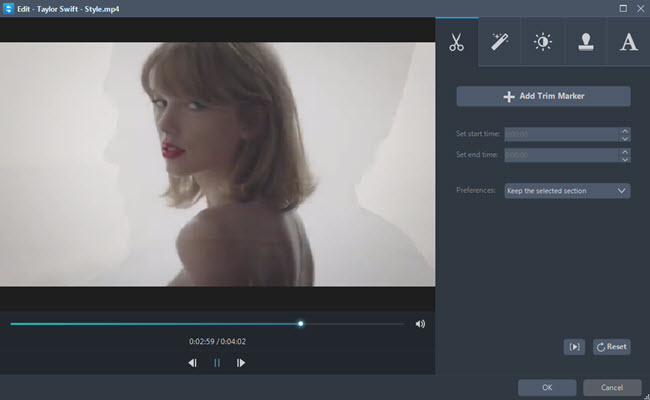
Video Converter Studio is another frame by frame video editing software for windows users. Its name implies its main feature as a video converter but its editing function is as powerful as Windows Movie Maker. Besides, aside from its editing and converting functions, it can also download videos from the Internet, record video/audio, and even make photo slideshow with music.
After the software is well installed, open the video you want to edit frame by frame through drag-and-drop or clicking the “Add files” button. Once the video has been loaded, click “Edit” and you’ll see the editing functions. Drag the slider and select the portion you want to edit then click “Add Trim Marker”. When you have selected the frame, you can now make changes to your video. Click “Adjust” if you want to rotate or crop edges of your video. Hit “Effect” to adjust speed, volume, contrast, etc. To add texts, tap on “Watermark” and for subtitle, just tap “Subtitle”. Before saving your video, click on “Profile” to choose a proper format for the new file then press the “Convert” button. A short while later, the editing file will be saved.
Pros:
- An intuitive user interface.
- Builds in multiple functions into one software.
- Boosts a high processing speed.
- Supports 4K video files.
Cons:
Not free and its trial version is limited to converting 30% of your original file.
iMovie (for Mac)
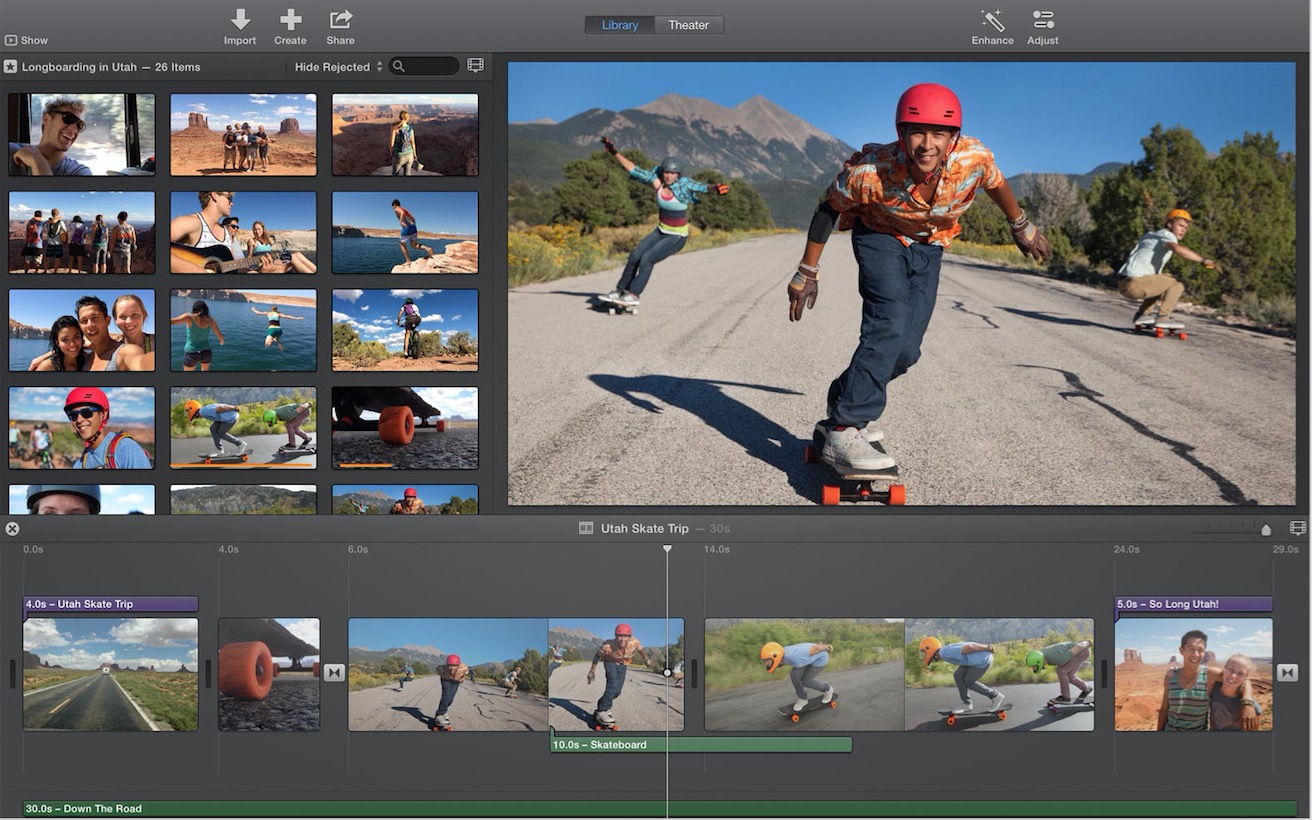
Since Mac is a closed system, there are fewer video editors available for use than on Windows. Thanks to Apple’s iMovie, we can use it as a frame by frame video editor to render the video. To utilize this tool, make sure that you installed the latest version of iMovie on your Mac.
Click on “File” > “New Project” > “Create”, then click “Import” button and add your selected file. Once the file has been added, click “Edit” > “Split Video Clip at Playhead” so that you can select the portion where you want to apply the changes. The frame will now be separated from the whole clip. You can now easily add audio, texts, voice over, transitions, effects, and background for your video. Moreover, you can overlay pictures or videos. There are also preset themes which you can apply. When all settings are done, click “Share” > “Export movie”.
Pros:
- Supports exporting and importing 4K videos.
- A lot of preset themes available to choose from.
- Various editing functions.
Cons:
- Not that user-friendly to beginners.
- Time-consuming to export files.
Final Cut Pro (for Mac)
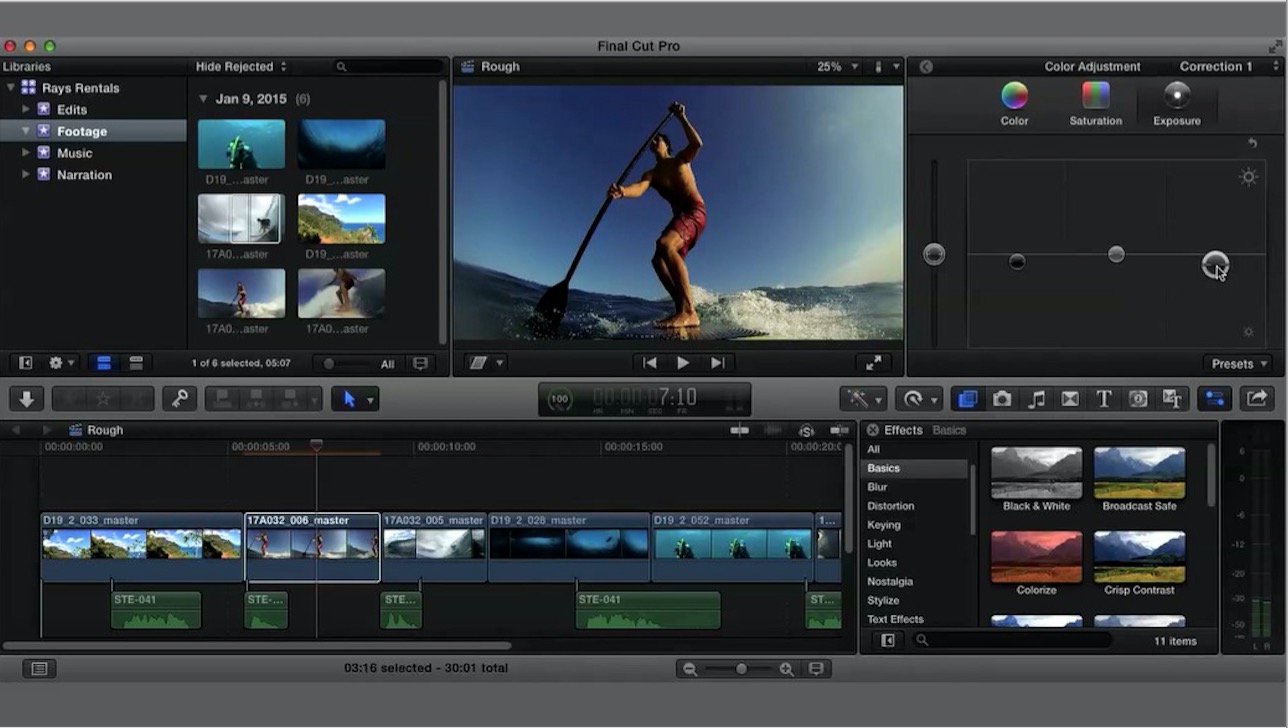
Another tool that can edit video frame by frame available for Mac is Final Cut Pro. This is Apple’s flagship video editing software designed for professionals. Unlike iMovie, Final Cut Pro is equipped with advanced editing tools such as magnetic timeline, background processing and many more.
Launch Final Cut Pro on your Mac then hit “Import”. Select your video file then split it into frames by clicking on “Edit” > “Blade” or press Ctrl+B. Once you get the portion of your video, you can now make some basic editing. You can cut your video, crop edges, add texts, sound effects, voice over, etc.
Pros:
- Good for professional video editors.
- It comes with basic and advanced editing functions.
Cons:
- Very expensive.
- Not suitable for beginners.
How to edit video frame by frame with professional shareware
Apowersoft Video Editor (for windows)
If you are still not satisfied with the above applications, Apowersoft Video Editor is highly suggested to try. This program is designed to assist people in making or creating their own video in a very professional way. It is powered with a simple interface that gives us full control when we are editing. It covers nearly all elements people need when creating a video. For example, it gives multiple video templates, various transition effects, filters, overlays, texts, captions, background music/audio recordings, etc. To know the procedure to use this frame by frame video editor, following the below instructions.
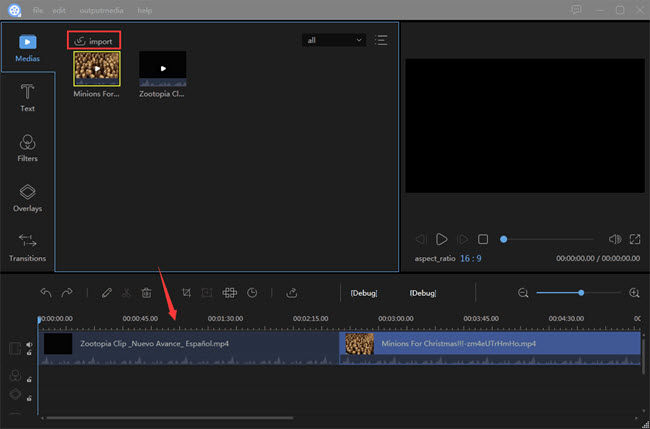
- Open the program then click “Import” on the top left corner to add videos to the “Media” section. Drag the video to the below timeline section, and you can edit it frame by frame.
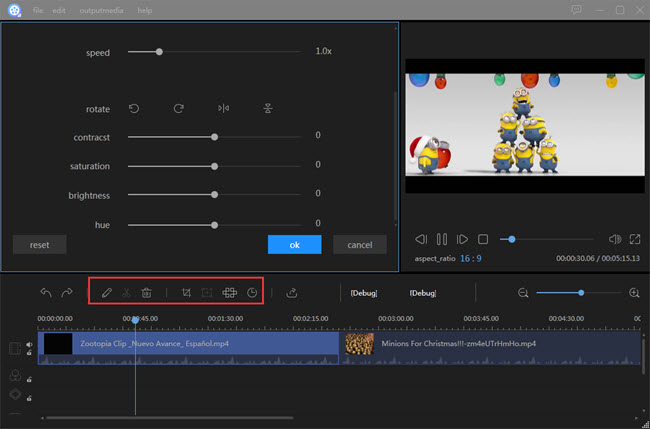
- Click the pen icon above the timeline to edit the video and audio. We can rotate the video, adjust the video playback speed, change video effects like contrast, saturation, brightness and hue.
- Click the scissors icon to split the video into several pieces. To remove one of them from the video, click the trash icon then.
- Click “Text” to choose one of the available text styles and drag them to the timeline. Others like “Filters”, “Overlays”, and “Transitions” are also added into the video in this way.
- To save the changes we made just now, click “Export” and set the video on desired settings.
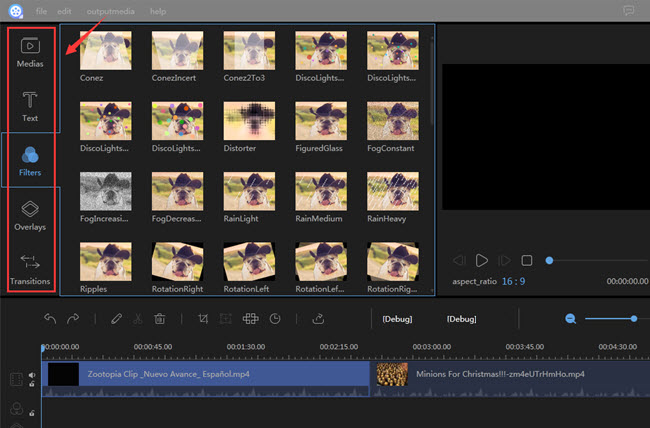
You see this frame by frame video editing software gives us more freedom to edit a video in details. All available video elements are covered. The only drawback is it’s not free. We have to pay for it if we don’t want a watermark to put in the video.
Bottom Line
If you find this post helpful, leave a comment and tell us what editor you find most useful to you. Or if you have any other advice different from the listed programs above, write a comment and we’ll be happy to update the content.


